Wednesday 23 July 2014

Easy Tee Sew-A-Long: Part 2, cutting out

After preparing the pattern yesterday, tonight I cut out the various pieces of the Easy Tee and pinned the front and back pieces together ready to sew tomorrow.

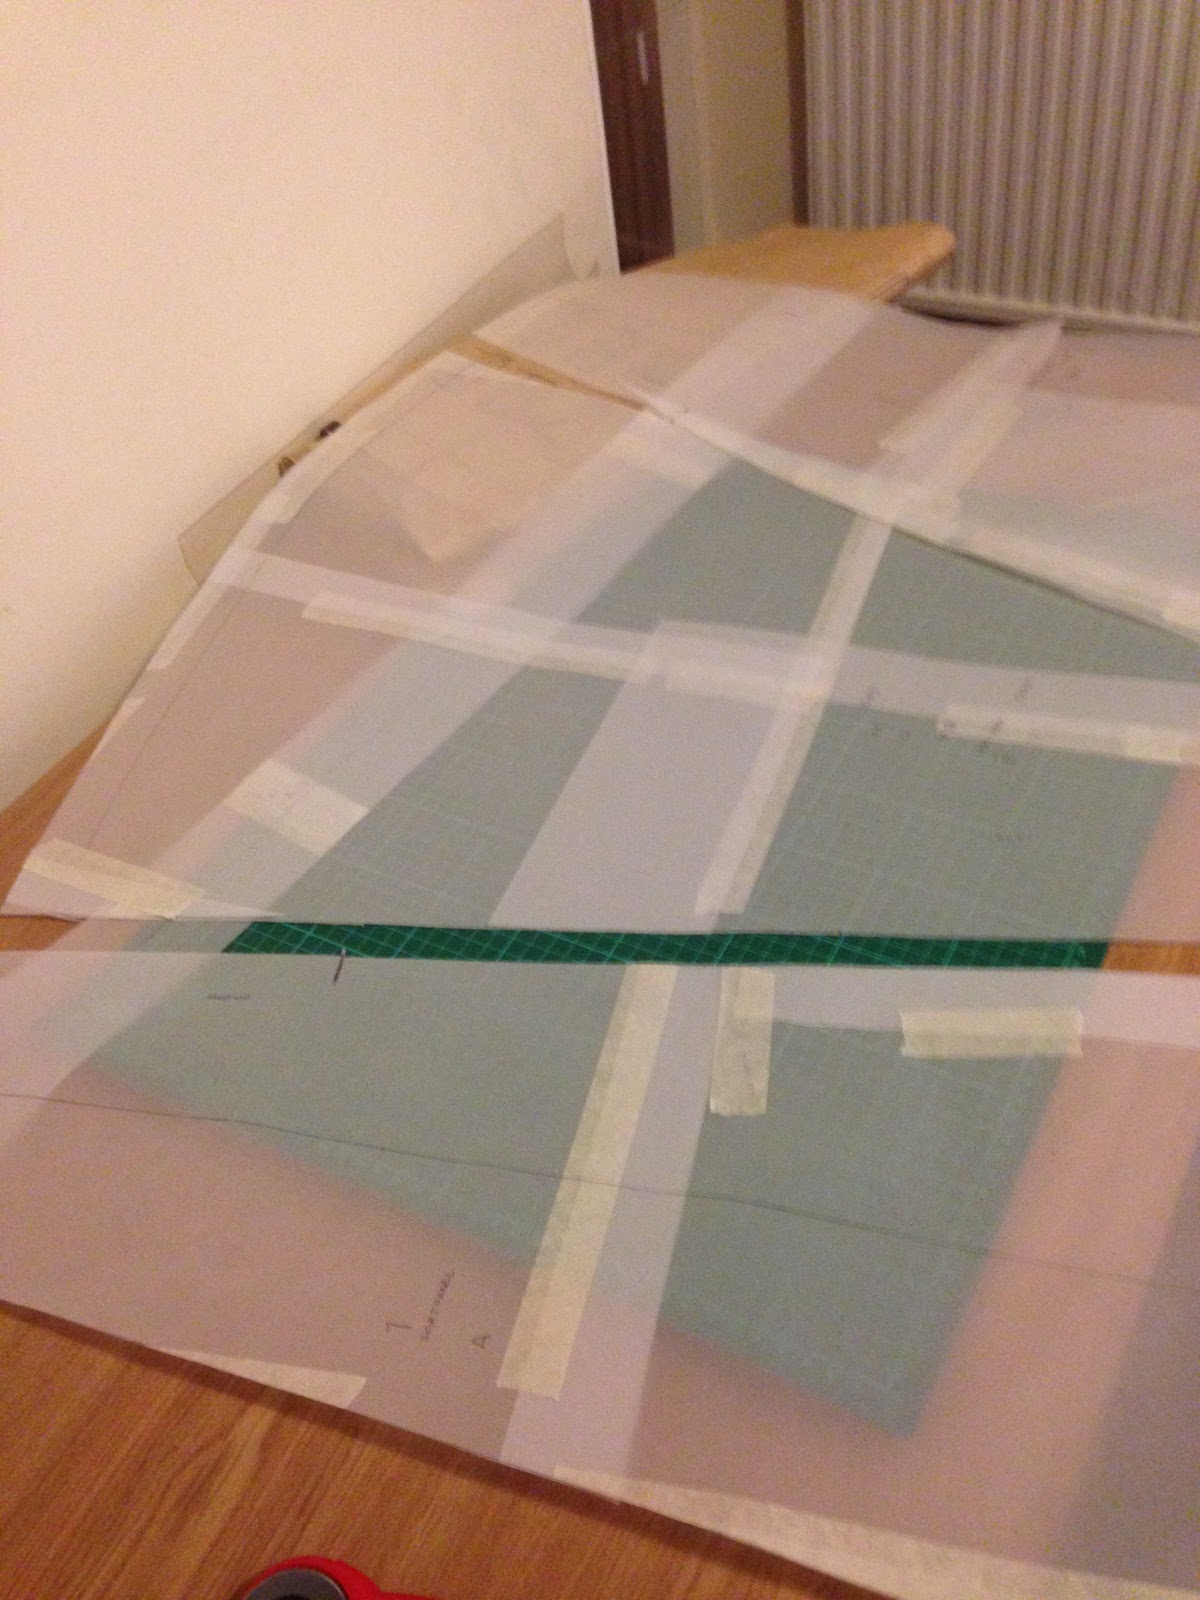
To do this step I used my rotary cutter, cutting mat and pattern weights.

I use some pebbles I collected last year, they are all slightly heart shaped as I had thought about using them as place names for my wedding, but in the end finding 80 suitable ones was too hard.

I laid out the fabric, folding the shelvedge over just far enough to allow me to fit the pattern piece on, then cut iron the fold.  As my fabric is quite thick, this was a struggle.  I think in sewing more than anywhere, you get what you pay for with tools.  My rotary cutter was very cheap, and I struggle to cut more than a thin layer of cotton.  It's definitely one to replace as soon as possible before I ruin fabric by having to keep going back and forward.  Do you have a rotary cutter, what brand will be a good one?

I did the same layout to cut the back piece and then pinned the two parts together.  The instructions also say to cut a strip of fabric 28" by 1.5"; as I had lowered the neckline, I increased this to 30".  I actually made a pattern piece for this as I wasn't convinced the fabric would stay flat if I tried to mark the strip straight on it.  I also cut out my collar pieces from my darker fabric, you cut 4 pieces, I did them double thickness so I only had to use the cutter twice, and turned the piece over for the second batch.

So, that's me ready to start sewing tomorrow.  How are you getting on? If you've not started yet, there is plenty of time to catch up, these two steps have hardly taken any time.

You can see some finished tops at the sew-a-long event page here

I really like how this is looking, what do you think?

I'd also like to thank Autumn for her great pattern, check out all her great ideas here. 


Tuesday 22 July 2014

Easy Tee Sew-a-Long: Part One, The Pattern

I am excited to be taking part in the Easy Tee Sew-a-long using the pattern from It's Always Autumn.  The pattern has a number of different versions, all free, so you can choose from a plain top, raglan sleeves, Peter Pan collar, pattern drop or colour block.

I decided to use the Peter Pan collar version, and bought a meter of cloud grey and a meter of charcoal grey cotton interlock fabric from Tia Knight on eBay.  The fabric was £3.99 a meter and feels lovely, with a decent stretch.  One of my pieces did have a flaw in it, but Tia Knight immediately sent me a replacement meter without any problem, so first class customer service.  Delivery was also within 24 hours of ordering which also impressed me.

So, back to the pattern. It only comes in large, and there is no real information on what size that will cover.  I've lost 11lbs in the last 3 weeks, so I am risking making the size without further measurements, as it does look generous.  The pattern prints on 6 A4 pages and there is no trimming, just line the edges us against each other and stick.  This made it one of the fastest PDF patterns that I have had to put together.

Once I had stuck it all together, I decided to lower the neckline a little as I generally prefer them to hit just above my chest rather than closer to my neck.  To do this I extended the straight line of the neck by around 6cm, then used a French curve to match the original curve of the neckline.  This meant that the collar piece no longer fitted, so I cut straight across it, put some paper behind it, and extended it by the 6cm.


So, that's all the pattern ready to cut out tomorrow.

If you would like to take part in the sew-a-long, just follow here, or join the Facebook event

Friday 18 July 2014

My First Self-Drafted Skirt: A-Lines and sunshine

Pattern drafting terrifies me.  I am not an artistic person, and I never feel terribly creative, although I can follow patterns or instructions pretty well.  So self-drafting my very own A-Line skirt did not seem like something I could do.

Unfortunately for me, circumstances forced the issue...well, I say circumstances, what I actually mean is that having got an idea in my head I was too stubborn to change it so had to find a way to make it work.

A few weeks ago there was a fabric warehouse sale in Aberdeen, and I bought some bright yellow and bright orange Tana cotton lawn, 2m of each.  My friend suggested that I could do a sort of two layer skirt with the other colour poking out at the botton, and I loved the idea.

A few google searches brought Ysolda's pocket ties skirt on Craftsy, it looked easy, had all the elements I wanted and seemed to need minimal cutting out.  After pre-washing and ironing my fabrics, I worked out the measurements and started to put them on the fabric. Then I tried again, then I changed how I had folded it, then I remeasured...

It turned out that the fabric was only 34" wide, and no matter how I adjusted it, there just wasn't enough for me to work with.  I may have stamped my foot, or possibly had a bit of a tantrum...at no point did I fling the fabric across the room...

Anyway, I decided to see what I could do to rescue the situation.  I wanted to make the skirt that weekend, and as our printer has died, I needed something that I could just mark on the fabric.  An A-Line skirt seemed like the answer, but the maths I was finding on some sites made my head hurt.  Then I found Melissa Hart's blog, The Cordelia Files and it sounded so easy.  Essentially, you take your waist and hip measurements, as well as the distance from your waist to your hips, and from this just draw out the skirt.  The only difference I made was to cut on the fold to save fabric.

This is the result
Please excuse the washing line through my head and the dodgy pose.  I made the cutest little pocket and used the orange to make the waistband.  From here it looks like I have bound the skirt with the orange, but it is actually a lining.

I love this skirt, and it is so summery and happy, I can see me wearing it all summer, and even in winder with some thick tights.

I do want to put a couple of darts in the back as I built in a little too much ease, but that can wait for another day.

A couple more photos...
You can see where the darts need to go to stop the creasing in the back, but with a long top, it's not noticable.


Have you got a favourite item that just makes you smile when you wear it?


Wednesday 16 July 2014

Lekala 8001 Tunic - A successful top

Following on from my last post, I have managed to make a successful tunic top using the free Lekala 8001 pattern from here

I was very optimistic about the pattern, as I had to provide my measurements for bust, underbust, waist, full hip, with options to add in hip, neck and upper arm.  I chose to add in upper arm as I thought that might be important, and then made further adjustments regarding bust and back, where I could pick a description which fitted me best.

In the end, I chose lower than normal protruding bust points (what a description), narrow back and wide bust.  It would be helpful if Lekala provided some sort of guidance as to what they think normal is, and also a guide to their terminology, as I was unsure about a couple of the optional measurements.

You can choose to have seam allowances included for $0.50 (about 32p in the UK), which I did, but they didn't charge me, something that also happened today when I ordered more patterns.

In less than a couple of hours, my pattern was emailed to me and I printed it out.  I have only pieced together a couple of other PDF patterns, and this one was the worst I have tried.  There are no helpful marks on the corners to make sure you have everything lined up, and it took me a few attempts to get it all sorted.

Making the tunic is easy.  You sew two back darts, then the two back panels together before attaching the front panel, then the facings.  The instructions are minimalistic, but give you enough to go on, and google is always there to help with any unfamiliar terms.

In total, I probably spent about 8 hours making the top, including cutting out, and this could have been reduced had I chosen not to top stitch the facings.
This is the front view of my tunic, I do still have to put buttons on the planket, but it is wearable without.  I have a couple of puckers at the shoulders where I think the armholes stretched, next time I will staystitch.

The casing for the tie is too high, I hate to think where it would have been if I'd said I had a normal bust height!!


The back is slightly less flattering, but I plan to take in the darts a bit as they are very narrow, and see what happens.  I'm also not sure how I feel about the back seam, it might not bother me in a darker colour, but it seems quite obvious here.

The fabric is this cotton shirting from Croft Mill, and was lovely to sew, although a little prone to fraying.  It's a good thickness and washes brilliantly.

What was the first successful top you made?

Thursday 10 July 2014

Butterick 4685: Disaster Toile!

After making my brilliant circle skirt, I decided that I really should make a couple of tops to go with them and Butterick 4685 really took my fancy, the tops looked so pretty and I could see myself making all views of it.
At the weekend, I traced out my pattern pieces, as I was sure I'd want to make this again and again in various sizes.  I did have to lengthen the front and back body sections by 2" which surprised me as I never thought I had a long body.

One Tuesday, I cut out the pieces to make the view photographed on the cover,  and pinned them together, which is when I got a bit worried.  The top looked totally shapeless.  Although it did have a slight shaping at the waist, it was essentially straight sided, with no darts or any shaping tools.  I had a bit of a panic, and asked the wonderful ladies on The Sewing Forum for advice.  Most came back to say that with my generous bra size, they probably wouldn't have gone for this design, as it would end up like a sack and not be flattering at all.

Last night I decided to see what I could do to save it.  I took the seams in by a quarter inch around the bust, and a half inch around the waist, which helped a bit, but did cause some creasing across the bust.  I could live with that, but then I looked at the back, which was gaping badly.  As this was just a toile, I hacked a centre seam into the back piece and took about an inch out of it which also helped, but there was just no getting away from the fact that it looked like a sack.

I have to admit that I gave up at that point.  I'd also sewn the sleeve in the wrong way round, though in my defence, it was the first sleeve I'd ever put in.

I'm not giving up on the pattern, but I think I will try the view in the yellow as it has elastic under the bust which should help my problem, and I'll choose a smaller size doing a full bust adjustment.

I've now discovered Lekala patterns, and have ordered this one, which I hope will be more flattering.  I have my knitting group tonight, but I'm aiming to make it up on Friday to wear at the weekend.

Wish me luck!! Have you made any Lekala patterns, and if so, any hints?

Wednesday 9 July 2014

Crochet: my new toys

When I was at my knitting group last week, I noticed how quickly all the crochet girls were getting on with their projects.  I felt a little jealous as I tackled week 4 of what was meant to be a fast cowl for my mum's Christmas.  So what could I do, but buy myself a little set of crochet hooks and have a crack at it.

Crochet hook
I watched a lot of tutorials and finally, today, I got round to trying it out.  I struggle with holding the yarn right, but I'm sure once I am a bit more confident with the stitches, I can sort that out.  I'm also certainly not fast, but again, I'm sure that will come.

One thing that intrigued me about crochet was the stitch names...double crochet, treble crochet, half treble...how can you have a half treble?  I also found it really interesting that there is such a difference between UK and USA terms.  I've never been good at languages, but it looks like I will need to become bilingual for crochet at least.  It means that it's important to know where your pattern is from, and what terms it is using, as if you used the wrong one, your project would turn out totally different which would be disheartening for a beginner.

I can't wait to share all my new crochet adventures with you, any advice for me?

Before I go, I thought I would give you a close up of my lunchtime efforts.  I used a 5.5mm hook, which is probably a bit big for my wool, but I found it was easier to see my stitches and get a feel for what I was doing with it.
This is a few rows of UK double crochet, messy at parts, but a good effort I think

Friday 4 July 2014

The increadible kindness of others

It feels a bit like Christmas today, I have, sitting beside me, a huge bag of fabrics and I'm itching to get started working with them.

Before I do anything I thought I would blog about how this all came about.  A lovely lady used to do a lot of sewing and has since given up, but still had a ridiculous stash of fabric and habby.  She decided to clear out, and to donate all the fabrics to people she knew, people who would love them and use them.

What followed was an incredibly exciting day of facebook activity, a photo and description of the fabric would be posted, and the first person to say yes would be given it.  When it came to buttons, it was so fast paced it was a real race to see who was given what.

I can honestly say that this lady has really made my day/month/year.  Due to having to support two houses on 1.5 salaries, we have not had much spare money, so I have been buying cheaper fabrics, often polycottons and synthetics, unless there is a brilliant deal going.  I firmly believed that any luxurious fabrics would have to wait.

I am honoured that I was allowed so many of the fabrics (I may have got a bit over excited, but who can blame me!).

So, what do I have in my bag?
The top left is a navy houndstooth wool suiting, which I hope to turn in to a suit for work, I've not measured it, but there seems to be plenty.

Beside it I have a couple of yards of a fairly thick linen which will be fabulous as a summer top

Then come the silks, that's right, 100% silk charmeuse or chiffon.  The rose patterned one is the chiffon, I'm already imagining a skirt with the chiffon floating over the top, and as I have about 5 yards of it, I may even consider a top and a dress! As it is silk, I would have to find some good deal for a similar quality lining for it, but it is so pretty.  The cherry and banana prints are so much fun, I'm hoping that the Cherries will turn into a tea dress type thing, and the bananas I am considering for a top or skirt.  The bright abstract is hopefully going to be a Sorbetto top, if I can work out how to adjust the darts.

Under the abstract is a Calvin Klein wool, its a burgundy red with dark green through it.  Again, I'm hoping to make this into a suit, though pattern matching could be fun.

The final row has a really fun Buru Buru dog print, which I plan to make into a little dress and nappy covers for a friend who is expecting a little girl.  The baby is due in November, so I'm aiming for about a 6 month size, but I have no idea which pattern to use.  Finally I have yards and yards of silk crepe (I think it's silk) which will be at least a skirt if not also tops and dresses.

In a final act of kindness, another lady dropped off my fabric to me as my hip is playing up again and I couldn't make it to where the fabric handovers were happening.

Which is your favourite from my new stash, and any suggestions for patterns?

Tuesday 24 June 2014

Finally Finished Skirt - New Look 6056

It's finally done, and to be fair, it is an easy pattern that took me far longer to do than it should.

The skirt is a circle skirt, made from two panels cut on the bias and sewn together, with a waistband and zip.  There are no real complex steps to this, however the sheer volume of fabric can be daunting.

My biggest issue was with the lining I decided to add.  The fabric, a lovely blue satin lining fabric from Pennine Fabrics (£1 per meter!) was a bit of a nightmare to work with, being very slippy. The hem that I did is dreadful, but I can live with it for a first real project.

For the skirt, I opted to follow this tutorial from Colletterie, which worked brilliantly and I have a lovely even hem.

I forgot to take a photo of the skirt close up, and will add one when I remember, but I chose to wear it to go to the Graduate Show for the Art School in Aberdeen, where a few of my friends were showing their work.  A few drinks may have been provided, and I found myself having great fun spinning around in my new skirt...


The skirt cost me around £25 to make once all postage is taken into consideration.  The main material was £2.50 a meter from Greens of Blackburn, who unfortunately appear to have stopped trading online.  As I said before, the lining was a steal at £1 per meter, and I really can't rate Pennine Fabrics highly enough.  I needed 200m of Gutermann thread and one zipper.

I got lots of compliments about the skirt, which felt great, there really is something about being able to say that you made it when asked what shop it is from.  What have you made that gets the most comments?

So, next project is a top to go with the skirt, I have some issues with the pattern, so I'll be addressing them as I go along.

Thursday 19 June 2014

My Grandmother's Sewing Box

I had a wonderful relationship with my maternal (and parternal) grandparents, with so many memories of being with them when I was younger.  My grandma playing the piano and baking with us, my grandad joining in my sister and my make believe games and fort building, not to mention being allowed to make things out of real clay.

When the time came for them to move, and it was necessary to dispose of a huge number of items, my eye fell on something.  It was my grandma's sewing box, nothing fancy, but I had many memories of opening and closing it, as I loved the way it expanded, and of looking in all the tins to see what they had in them.  It's been in my posession ever since, but it is only in the last few months that I have been actively involved with it again.

I still have her old tins for my needles, and some of her very vintage thread.  I am not sure if it is useable for machine stitiching given it's age, but it will never be thrown out.  When I opened the box and had a rummage, I found a half finished pom pom from the 1980's, no doubt made by me.  Remember the days when you had two doughnuts of cardboard and you wrapped wool around them until you couldn't fit any more on, well my grandma had kept one of mine.

I feel that I should keep her notions, threads and buttons, but also know that she would have hated the waste, and loved that I had developed a love of sewing and knitting.  So, when finishing my circle skirt, I took the plunge and used possibly the most vintage hook and eye...what do you think?
Newey Brothers, Newey's Hook & Eyes

Do you have any inherited items for your crafting?

Saturday 14 June 2014

Attaching my waistband to New Look 6056

So last night I finally got round to progressing my New Look 6056 skirt, which is from their Project Runway collection.

I had already done most of the work, it just needed the waistband attached and hemmed, but as it is a circle skirt, the hem is a little daunting.

The instructions to attach the waistband were clear, although I think I went a bit wrong on sewing the ends which form an overlap tab for a hook and eye, as they look a bit odd and are a bit too narrow.  Still, they will work and for a first attempt I'm happy with it.

The most difficult part involved stitching in the ditch.  This is where you sew in the stitch line of a previous step so that the new stitching is invisible.  This scared me a bit, and I decided to hand crank my machine rath than use the foot pedal so that I would have a little more control.  This was laborious, but worth it for the result.

The first step was to fold over the waistband and press it, making sure that the inside edge was slightly below the original stitching line.  This is very important and I got is wrong in a couple of places so had to rest itch it as the waistband hadn't caught the stitching.

Next, line up your needle with the 'ditch'.

 
I then hand cranked the machine all along the stitch line, noticing when the needle felt like it was going through too much and checking my alignment.

I'm really pleased with the end result, it looks pretty professional

This is the inside


The outside looks really neat too

Now I just need to hem it and I will have a finished skirt, hopefully by the end of the weekend.

What sewing do you have planned?


Monday 9 June 2014

Knit Camp 2014 Bobble Hat

I have been busy studying recently, having just had another batch of my accountancy exams, so my sewing machine has unfortunately been relegated to it's bag so that I could use the table.

Still, you can't study all the time, and so I have used this last couple of weeks to get on with the projects included in the Knit Camp 2014 kit I got at Christmas.

My latest project was a two toned hat which was worked flat.  I have never worked with more than one colour, and have also never had to join in another ball of yearn, so this did scare me quite a lot.  Thankfully, the tutorial provided here gave me the method to add in my bright pink yarn easily.

I also needed to add in another ball of yarn as I had just carried on with the ball I started for some mittens, and found a method on YouTube which suggested that in an inconspicuous area, you hold the new and old yarns together and knit (or purl) three stitches with both yarns.  Then you just drop the old yarn and carry on with the new ball.  Once I worked out which way to hold the yarn so that it came from the ball rather than going in the other direction (far more confusing than it should have been) the result was great and very hard to see.

The pattern was designed by Joanne Scrace Aka Not So Granny and gave a great product using easy techniques.  In fact, all that was needed was knit and purl stitches, knit2tog and SSK (a new one for me, but easy once you get the hang of it.) I will be looking out for more of her designs in future.

So, the finished result...
bobble, Knit Camp 2014, Hat

My next knitting project is a big one, a summery shawl in a bamboo tape.  I have never tried lace knitting, and now realise this is much harder than I expected.  Fortunately I'm heading to the Aberdeen S 'n' B group this week, so someone will be able to get me started.

This is my pattern

I have the same colour of yarn as in the picture, can't wait to team it with some of my summer outfits.

Hopefully my next blog will have my finished circle skirt, I just need to join the lining in and add the waistband.  If this weather keeps up, I'll be needing it.

What summer projects do you have planned?

Monday 19 May 2014

Unusually small patterned Hottie

Apologies for the gap between posts, I was floored by a particularly nasty ear infection which made it hard to concentrate enough to craft much.

Now that I am recovered, I thought I would share my most recent project which was fantastically quick to knit up, with excellent instructions.

For my Christmas, my sister and brother-in-law gave me the Knit Camp 2014 kit, which contained a pattern book for three projects, a 1L hot water bottle, two large balls of Libby Summers Fine Arran wool in Navy, one small ball in pink and another small in turquoise.  It also came with two stitch markers and 5mm wooden needles.

Being the ambitious sort, and having got a bit bored of garter stitch on my previous hottie, I decided to dive in with the hottie pattern.  It is fairly easy as long as your husband doesn't talk to you when you are counting (once finished I could tell when I'd been forced to have a conversation!) and mostly contains knit and purl in various combinations, as well as various methods of increasing and decreasing.


The pattern book was excellent, and gave a summary of how to do any unusual things.  I had never done the M1 (make 1) method of increasing, but thanks to the booklet and a quick check on youtube, I managed easily.

The kit did include links to the website and I wish I had looked at that first, as there are detailed blog posts to help you with every step.  However, I think it would be useful for them to stress the importance of the tension guide.

Every knitter has a different tension to their knitting, and I should know by now that I have a fairly tight tension, no matter how hard I try to relax it.  The tension guide stated that 18 stitches over 24 rows should measure 10cm...I didn't check and this was the result...


As you can see, my hottie knitted up tiny, I would estimate it maybe worked out about half size.  If I had taken the 20 minutes or so to knit a test patch, I would have realised I needed to use 6mm needles with the Arran wool to make the right size.

I did really enjoy the pattern, and I am planning on trying it with different wool and needle size to make one for a normal hot water bottle.  The design looks complicated and time consuming, but I would estimate it took me maybe 10 hours to knit and make up the whole thing, so definitely a weekend project.

I now have the little mitts and hat to try, the hat involves changing colour which I have never done, so I'll let you know how that goes.

What was your most irritating lesson?

Tuesday 6 May 2014

Cosy Hug Hottie

This weekend was a great holiday weekend for me, as I managed to finish a project that has been sitting in a bag for far too long, a huggable hot water bottle cover in Rowan wool.

I wasn't able to sew over the weekend as I had to have my legs up, so got out my knitting and worked away.

The design I was making was the Hug Hottie pattern from Rowan, which is available for free from here.  I chose this pattern initially as it seemed fairly easy and I thought it would be quick.  The pattern definitely is easy, you only really need to know how to knit, purl and do an increase and decrease.  The downside is that for the most part, you are doing garter stitch which I found pretty dull, and I had no impulse to pick this up and finish it.

When I looked at what I had done before, I wasn't happy with the quality, so ripped it all out and started again, so this definitely is a weekend project.

You knit it in three parts, the back, upper front and upper back.  The recommended wool is Rowan Baby Alpaca, but I used Rowan Baby Merino Silk as I wanted a nice colour.  As these are both DK wool, they were interchangable, although I did have to go up a size of needles and used 5mm and 5.5mm.  I finished it with three cream buttons to add contrast, and decided against the ribbon, as the person I am giving this to has a puppy who might enjoy pulling at ribbon.

What do you think, would you like this as a gift?

Monday 28 April 2014

Comic Maxi Gathered Skirt

Follow my blog with Bloglovin
After my weekend of disasters last week, I decided to do a quick and easy gathered maxi skirt this weekend.

My guide was the wonderful tutorial on the Simple Bliss Blog and have to admit, it was fairly straightforward.

To make the skirt you need a piece of fabric which is at least as wide as you are, the wider it is the more gathers you will achieve.  It should be as long as you want the skirt to be, a bit longer if you want to add a hem.  You also need a piece of waistband elastic long enough to fit around your waist with a seam allowance.

I ordered material from ebay which was a jersey knit fabric, and 50mm wide black elastic for the waist.

The steps are fairly easy.
  1. Loosen the tension a bit on your top thread, and stitch along the top.  Break this in to sections, I would suggest quartering your fabric and marking each quarter.  When you get to your mark, stop stitching, cut a long tail of thread, then start again for the next section. Don't secure the ends of your stitching.
  2. Repeat step 1, but do the stitching just below the first line.
    Two rows of stitches for gathering
  3. Tie a knot in the threads at one end of the first section, then gently pull on the bottom threads at the other end of the section.  This will cause your fabric to start to gather.
  4. Do this for all the stitches, you are aiming to have the material the same width as your elastic.
    Example of gathering in progress
  5. Once the fabric is the right length, even out the distribution of the gathers, and secure all the threads
  6. Pin your fabric to your waistband and then sew it together.  I attached it so that the bottom row of threads was about 1/4" above the bottom of the elastic.  I also used the elastic stitch on my machine which will allow the thread to stretch.  As you can see, mine was anything but perfect, but the wide waistband hid a lot of sins...
    Example of gathering secured to waistband
  7. Now pin both long edges together and sew that up.  You shouldn't need to use a special stitch, but I went with a zigzag just to be safe.
  8. Finally, you need to sort the hem.  Pin the skirt to the length you want it to be, and either cut off the excess, or use your preferred method of hemming.  I chose to hem it, but I would suggest you use a zigzag stitch, I used two parallel rows of straight stitching which looks lovely but has no give and is constricting when I walk.
And there you have it, a fully completed gathered maxi skirt.  The wider your fabric compared to your elastic, the more gathered your skirt will look.

If you make this skirt, please pop a photo on here, I'd love to see your versions.


Finished Gathered Maxi Skirt in Comic material


Thursday 24 April 2014

My weekend disasters!

I have no photos for you today, my weekend was a disaster!

As planned, I got up bright and early on Friday morning to finish my first ever skirt.  All I had to do was sew in the zip, do the waistband and hem it...an easy mornings work.

First the zip.  I read my Alison Smith book, I watched some YouTube videos, I stitched the seam up to the zipper point then basted the rest.  I pressed the seam and hand tacked the zip in place. I then tried to secure the zip.

Three hours later, I had a zip that was passable, not pretty, not close to perfect, but unlikely to fall out.  I need to do a lot more research and practise with zips, does anyone have any favourite tutorials?

Then on to the waistband, where I placed the interfacing over the material and pressed, resulting in a lovely big load of interfacing stuck to my iron.  I worked out how to get the rest to just stick to the material, and moved on.  I attached the waistband to the top of the skirt, pinned in place and sewed.  It looked like one of the best rows of stitching I had ever done, neat, straight, just perfect.  Unfortunately, when I went to press it, I noticed I had caught one of the folds of fabric in the stitching, so had to rip it all out again, ripping the fabric too in one place.  When I tried to pin it in place again, it no longer seemed to fit, the waistband was too short! I have no idea what has happened, but at that point the whole project was folded up and put away, I'll try again another day.

I also did manage to very successfully start my lovely flowery skirt, though trying to lay out 5m of fabric in a 2.5m space was quite a lot of fun.  My lining should arrive this morning, and I hope to finish that one over the weekend.

My comic material didn't arrive until yesterday, so have not started that one yet, but planning to make that up tonight so I can wear it to dress down Friday tomorrow, and to my course at night.

I think I may have caught the sewing bug though, last night my husband asked me what was wrong, as I looked both in pain and frustrated.  I had to confess that I was really annoyed I couldn't do any sewing as my leg was insisting I be horizontal.

I hate to do a blog with no photos, so thought I would end by posting one of the vintage patterns I managed to get hold of.  They are all vintage size 16s, so I think I have about 6" to lose off my waist before I make them, but what an incentive!!  I normally go for 1950's styles, but these just looked so much fun (though only planning to make the maxi skirt rather thanh the crazy blouse!)


Thursday 17 April 2014

Easter Weekend Sewing Marathon

I am all alone over the Easter weekend, as hubby is taking the dog down to see his family, and I have a course on the Saturday so can't join them.

To keep me from feeling too sorry for myself, or from munching my way through all the Easter eggs, I have planned a marathon sewing weekend, and will attmpt to finish three skirts...am I mad!!!

The first one is already almost done, and is my curtain lining Burda skirt.  My zip arrived from Plush Addict so I can get that inserted and pin up my hem.  I plan to just do a basic turned up hem with a straight stitch, so should be easy enough.  Plan is to finish this on Friday morning.

Skirt 2 is New Look 6056
This looks like a super easy pattern, the biggest challenge will be the tracing and cutting out as the pieces are huge! You need 4.7m of fabric for this one, so I got 5m of this lovely polycotton from Greens Fabric and it was only £2.50 a meter! It is a bit thin, so I have also got 5m of a blue lining fabric from Pennine Fabrics who are a dream to deal with, happy to help and will offer suggestions or alternatives to help you out.

I am hoping to do most of this on Friday afternoon, so that I can take it to my friends' house on Saturday night for a bit of help pinning up the hem.  By Sunday, I should have my new blind hemming foot, so planning to try that with this one.

My final skirt was one I found on a blog post, and thought it looks so easy I had to try it. One Simple Bliss gives really clear instructions and lots of photos to help, so I bought an increadibly fun jersey print to make it with, and a 50mm elastic for the waistband.  The material was £5.99 for a meter, so more than I normally spend, but I only needed a meter so felt I could justify it.

So, am I crazy or is this possible?

Monday 14 April 2014

Burda 7042 - Making up part 1

Having done all my initial cutting and marking, the next stage was to start making the pieces into a skirt.

First of all, I set up my sewing machine, and put my magnetic seam guide (a Hemline one which was about £3.00) on the footer plate to help guide my material at the correct seam allowance.  I find sewing to a regular width very difficult, so I did find this guide to be a help.

I decided to use a fairly small stitch length, unfortunately my sewing machine model (Brother JK1700) does not have an adjustible stitch length, so I had to just pick what looked best from the stitch guide on the machine.

Using the guide to help, I did a few stitches, then reversed the machine and went back over them to secure.  After that I just slowing worked my way down to the bottom, where I used the integrated thread cutter to snip off the work. I did this to all 4 sets of panels, and then pressed the seams open.

The fabric frayed quite badly when I was cutting out, so I knew I would have to neaten the seams.  I decided to do the easy option of running a zigzag stitch along the seam and then snipping the fabric close to the edge of this.  I used quite a small stitch length, I did try a longer one but found it hard to control.


The photo above shows the unfinished and finished seam, I didn't press the seam after this, so it looks a bt wavy, but after pressing was lovely and straight.

It was only after I did this that I realised that if I did this to all the seams, I would not be able to let the skirt out if I had made it a bit on the small side.  Definitely something to remember in future.

I then sewed the larger panels together, but did not join them into a full circle.  As I currently don't have a zip for the skirt, I couldn;t do the next part of the instructions, so I skipped forward a bit.

The next step was putting in a tuck along the line marked in the centre of each small panel.  To do this, I first folder the fabric along the line, and then pressed in place.  The instructions called for this part to be stitched at 1/8", which was not marked on my machine.  I did try to guess, but ended up with a tuck 2/8" wide, which over the whole skirt would have made it a full inch narrower, so I unpicked it all and tried another method.

I measured 1/8" from the needle, and put a bit of masking tape on the footer plate to be my guide.  Thankfully this worked, and I was able to put all these tucks in place.


I pressed the tucks to the side, and put the skirt round me to check fit.  I can't have been holding it right as the photo looks a bit squint, but overall I think it's looking good.

I have ordered a zip from eBay, which I hope will arrive soon, and then I will be able to do the next section of adding the zip and waistband.

Any tips for the zipper insertion? I don't have an invisible zipper foot, so I have just ordered a normal one, and hopefully I can work it out.


Burda 7042 - Getting started

Well, I had no idea the initial stages would take so long.  From advice I got on The Sewing Forum, I decided to trace the pattern before cutting it, so that I wouldn't damage the original tissue, and when I lose weight, I could just retrace for a different size.

So I started with this

I didn't need the mat, rotary cutter of seam ripper initially, so moved them off the table.

I spread out the pattern, and hit issue one, my table is too small.  This meant that I had to tape my sheets of tracing paper directly on to the pattern tissue, and move the sheets about to get all pieces traced.  I stuck everything with masking tape, but when I had traced everything, I did find the pattern ripped slightly in a few places when I took it off.

I ended up with these pieces, having used my husbands tracing paper which is fairly thick.


The next problem was laying the pieces out on my fabric.  Again, my table was much too small, and in future I think I will resort to the floor.  My fabric was folded, and I had to cut 4 lots of piece 2, which gave me 8 panels.  The first set I did, I forgot to transfer the markings from the pattern to the piece, so had to line it up again.

I found the marking quite tricky, and in the end went for two methods.  For the curved hem allowance, I made long loopy stitches along the line, and then for the straight center line I used chalk and a long ruler.  For the stiches, I then snipped the loops and got a line of thread tufts to show me where to fold.


I mostly used the rotary cutter and cutting mat, although I did find my little embriodary scissors helpful for small areas.

The instructions then suggested joining the right seams together, using the 5/8" seam allowance included in the pattern.  So I pinned at right angles to the stitching line to secure the fabic before starting sewing.


And that was me, all set up and ready to sew.  Do you get prepared any differently?

Friday 11 April 2014

Welcome...and lets get started

Thanks for looking at my blog.

I have started this to track my various crafting activities, and hopefully help others to find good suppliers, new challenges, or just to share the mistakes I make along the way.

I have never sewn before, but having recently got a Brother JK1700 as a wedding present, I am excisted to get started.

Sewing seems a bit daunting to start with, and all the material I could find in John Lewis or HobbyCraft seemed too expensive to make mistakes with. I did purchase a meter of a reduced funky fabric which I used to make a draught excluder and a bottle warmer for red wine, but then the machine went away and nothing has happened since.

I have spent a lot of time researching the techniques involved in sewing, finding out about different ways to finish seams (who knew there was more than one!), and looking at all the wonderful things I can make.  A fantastic resource for informaiton and guidance is www.thesewingforum.co.uk which is a really friendly forum who answer even the daftest questions without making you feel silly.

I kept an eye on a number of websites, and managed to purchase a number of patterns from Minerva Crafts when they were on half price offer.  This gave me something to work from, and I started looking for fabric to use.

As we live on a very tight budget, I knew I couldn't really spend over £3.99 a meter, and was starting to doubt that I would be able to find anything in that price range.  Admitedly, in general you will only find polycotton at that price, as cotton prices have increased dramatically in the last few years.  However, I did find a few places on Facebook that did great offers, Greens Fabrics and Penine Fabrics.

I have also been introduced to the idea of using waste material to either make trial runs of an item to ensure it fits correctly, or to make an actual garment, and then dye the material to suit your needs.  When we helped a friend move house recently, I noticed she was leaving some curtains, which she let us have, and now they are freshly washed and waiting to be transformed.  One thing to note if you are planning to dye your creation is that polyester thread will quite often not take normal dye, so you may be best to use cotton.

Anyway, I now plan to make my first skirt from the curtain linings, and will try to post a step by step account of this.  The pattern is Burda 7042, and I think it looks fantastic, and not too difficult I hope.